


The first method is based on adding a meta-tag into the <head> section of your homepage.
1. You can find the meta-tag in the Meta-tag Verification tab of your selected domain.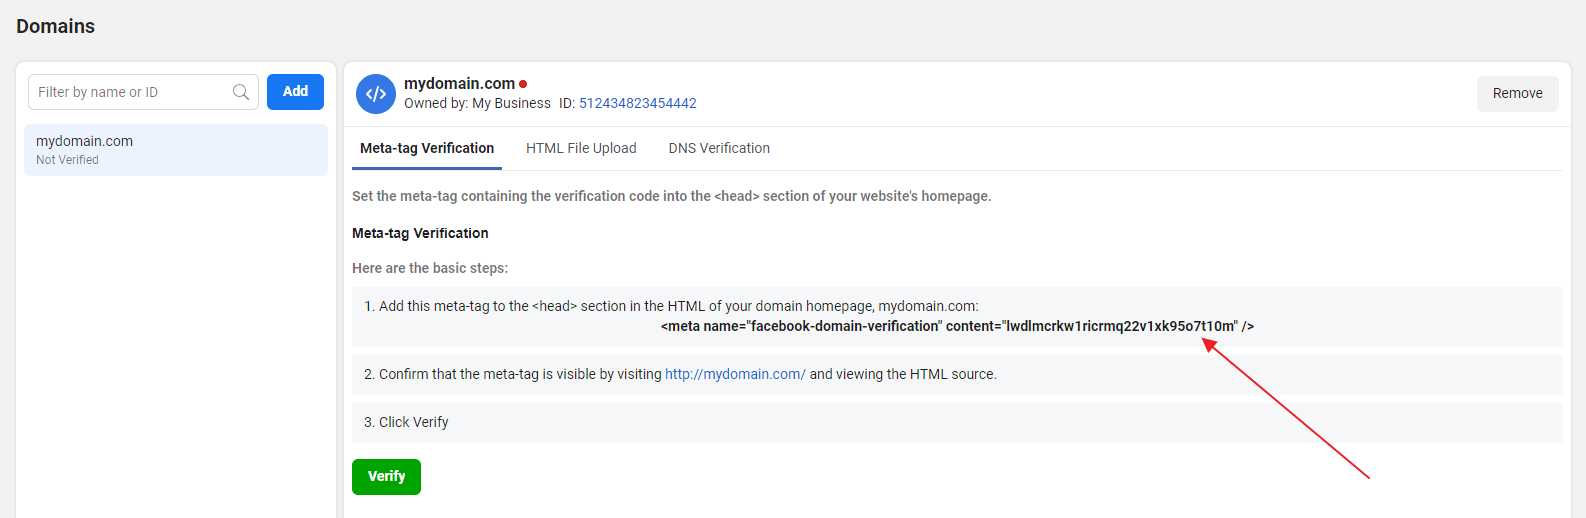
2. Copy the meta-tag and add it to the <head> section in the HTML of your domain homepage.
3. Check if the meta-tag has been implemented correctly by viewing the HTML source of your homepage.
4. Once that has been done, go back to Facebook Business Settings and click Verify under the Meta-tag Verification tab.
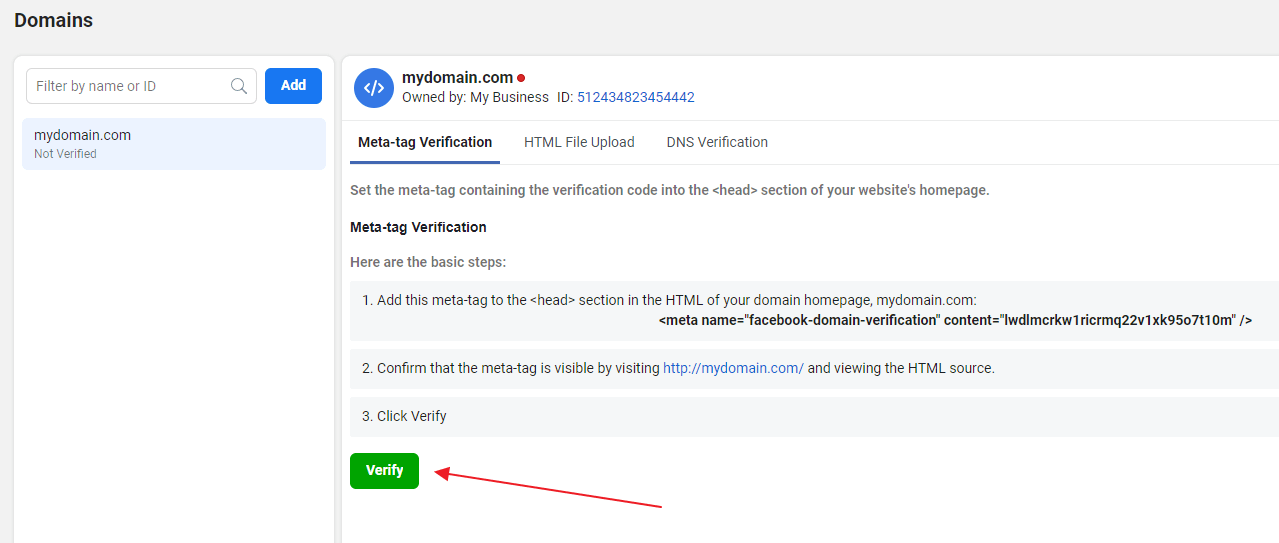
5. Your domain has been verified! Leave the meta-tag on your homepage, it maybe be checked periodically.
The second method is based on uploading a Facebook HTML file onto your web directory and confirming domain ownership.
1. Download the HTML verification file from the HTML File Upload tab of your selected domain.
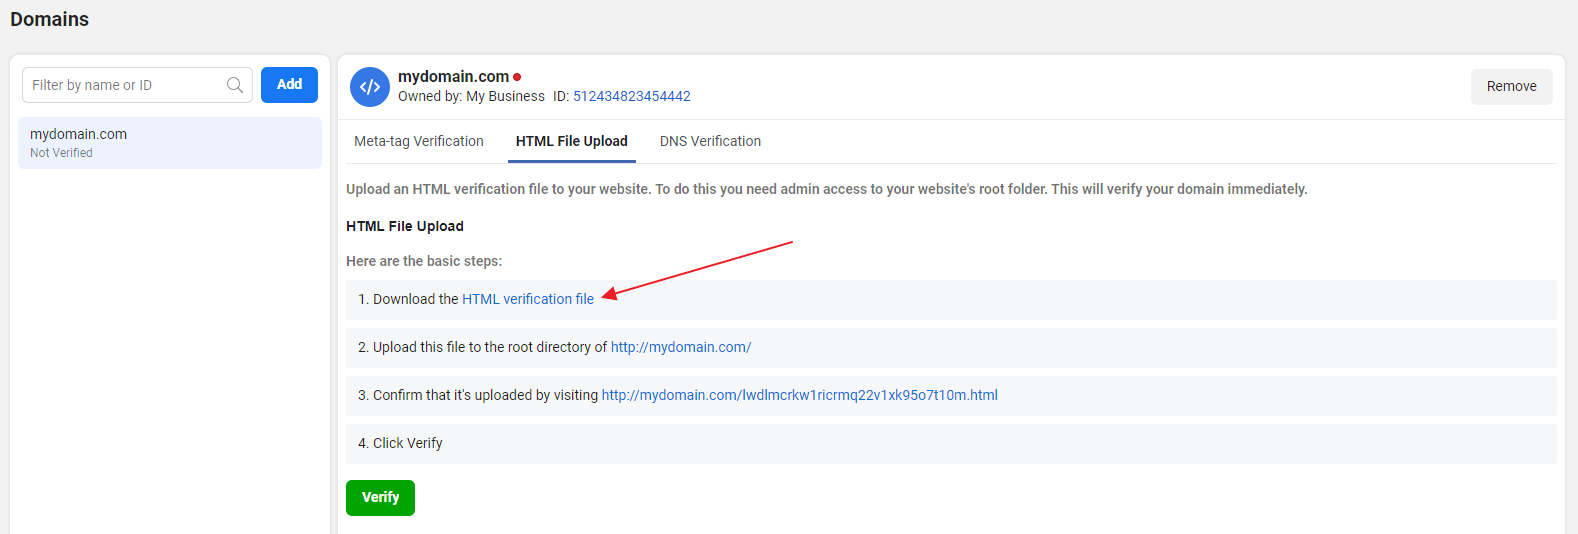
2. Upload the HTML verification file to the root directory of your website.
3. You can check if has been uploaded at the link under the HTML File Upload tab.
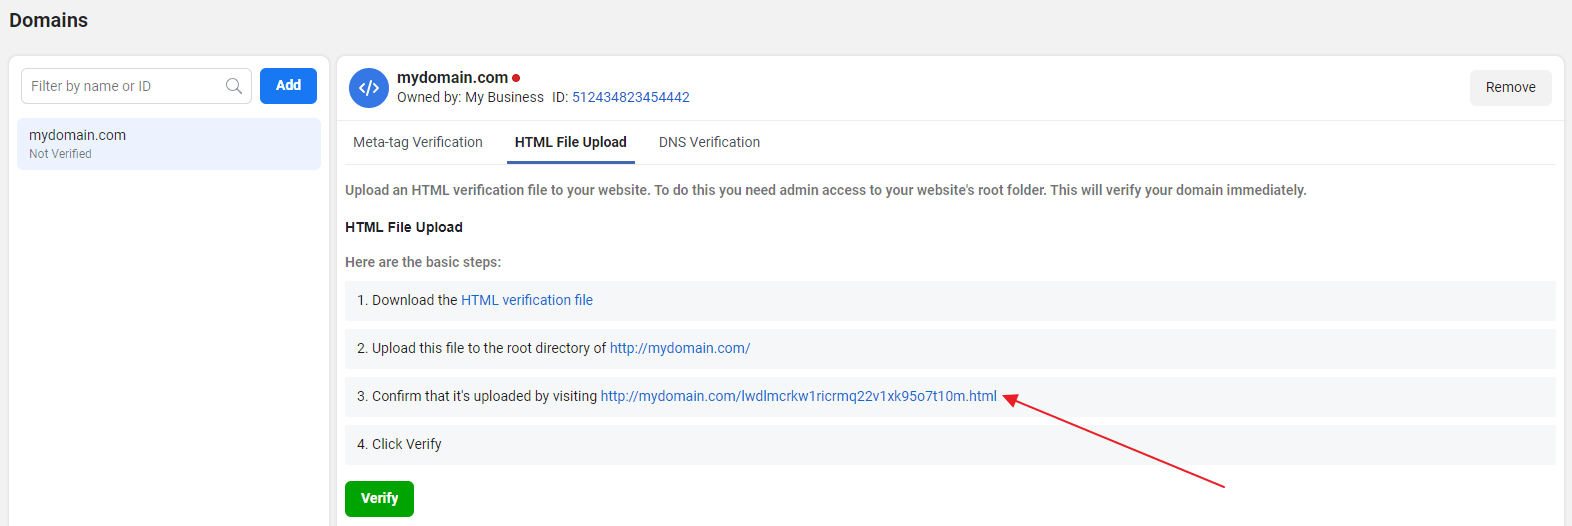
4. Once the code has been uploaded, click the Verify button under the HTML File Upload tab.
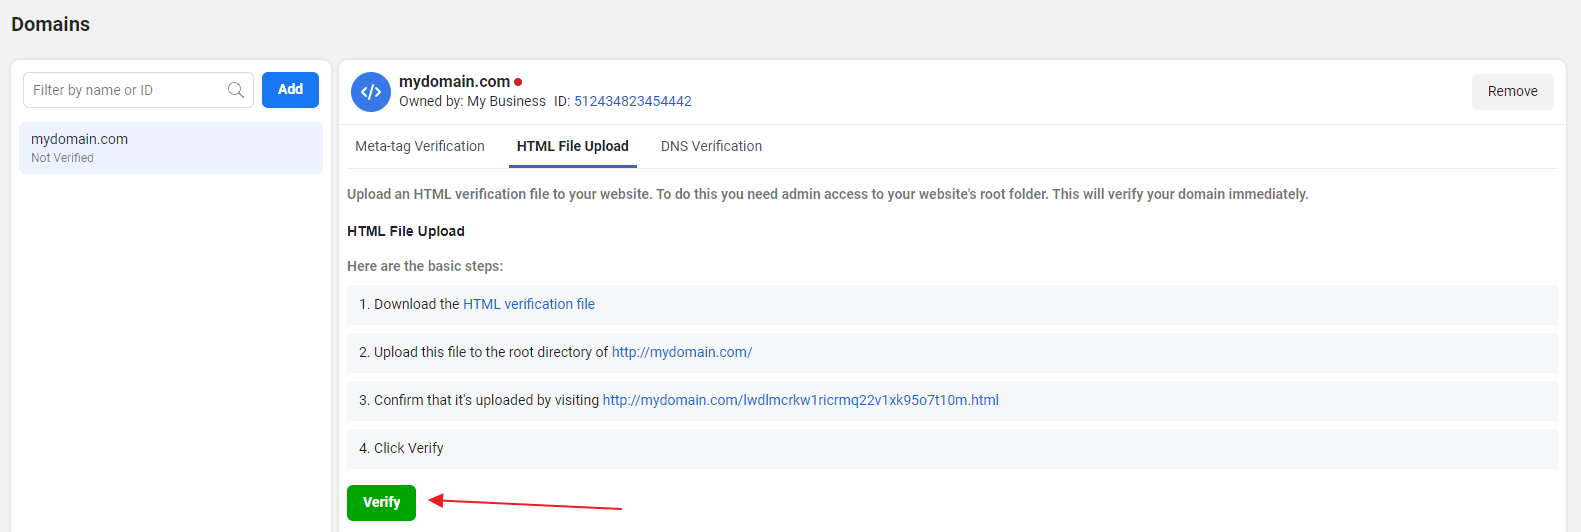
5. Your domain has been verified! Leave the HTML verification file in your website’s root directory, it maybe be checked periodically.
The third method is based on adding a DNS TXT entry to your DNS record.
1. You can find the TXT record in the DNS Verification tab of your selected domain. Click to copy to Clipboard.
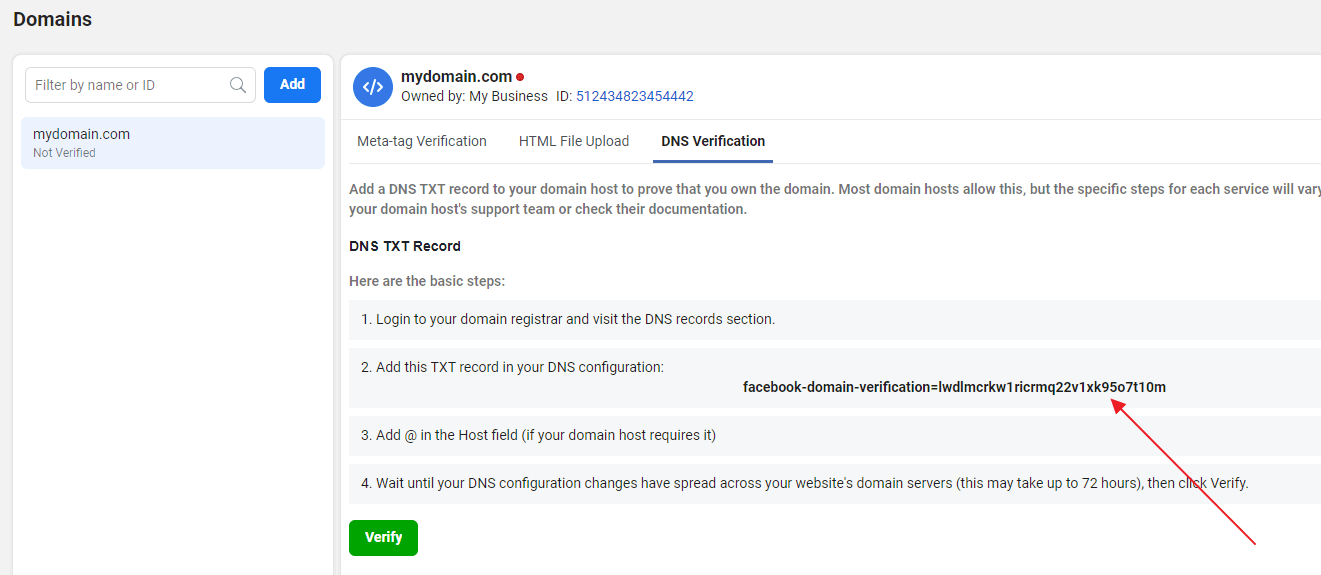
2. Next, go to the DNS record section of your domain host and add the TXT record in your DNS configuration.
3. Add @ into the Host field (if your domain host requires it).
4. Wait until your changes have spread across your website’s domain servers. This process may take up to 72 hours, although typically, this takes only a few minutes.
5. Go back to the DNS Verification tab and click the Verify button under the selected domain.
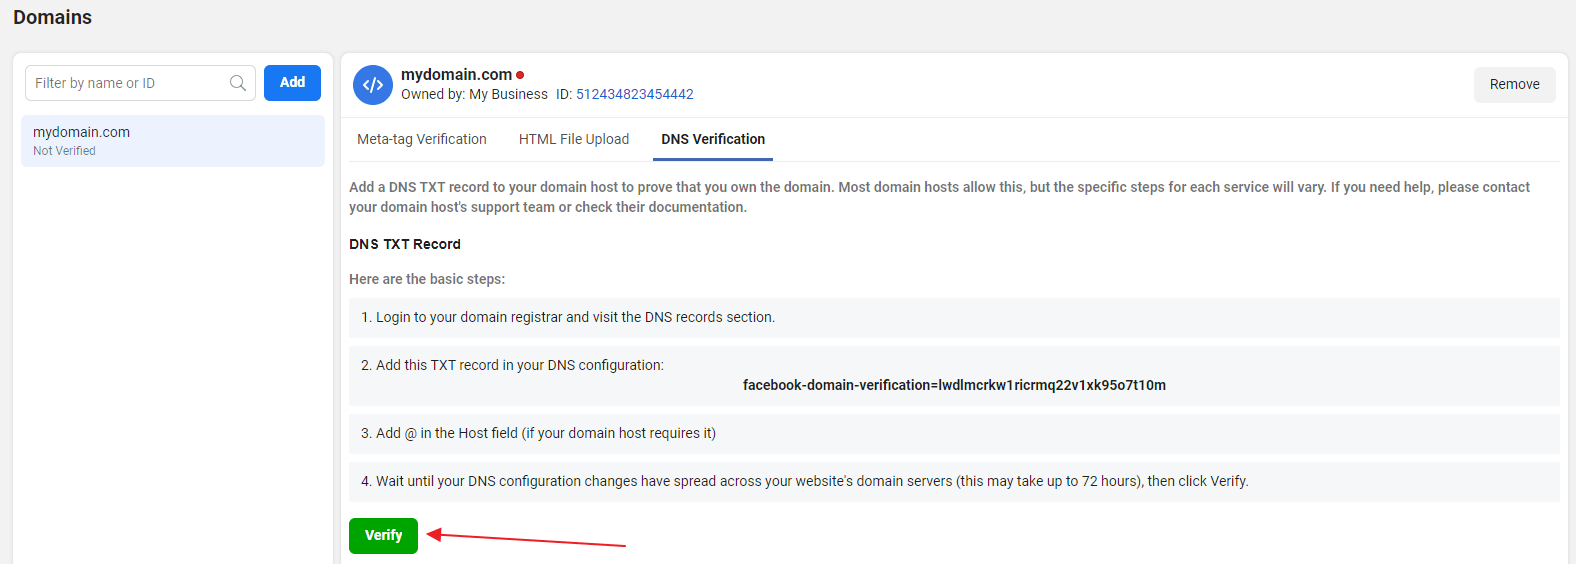
6. Your domain has been verified! Leave the TXT entry in your DNS record, it maybe be checked periodically.